
I have always been a huge advocate of Entra ID Governance and its usage. It is paramount to make sure the Identity Governance health is in a good position while applying the best practices because Identity is an attack vector, period. Once a bad actor gets hold of the identity, accessing confidential data, Azure resources, and stealing data is imminent. Privileged Identity Management is one of the key pillars in Microsoft Entra ID Governance structure and the goal of the PIM for Groups is to provide Just In Time Access.
If you have the required license already or planning to add the feature set in the future and looking to get the best value, this can be a good guide for you.
- Licenses Required for PIM for Groups
- How do you Onboard a Group to use this feature?
- Usages Explained
- Wrapping Up
Licenses Required for PIM for Groups
If you have the Entra ID Premium P2 license or Microsoft Entra ID Governance license, you are eligible to use the Privileged Identity Management features.
How do you Onboard a Group to use this feature?
This can be done to any Security or Microsoft 365 Group in Entra ID in 2 steps.
- Create your group
- Onboard the group
- Change the PIM for group settings (optional)
Create your group
When you are creating the group, you don’t need to add users at that time.
Onboard the group
Once the group is created, go to the group > Privileged Identity Management (under Activity) > Enable PIM for this group

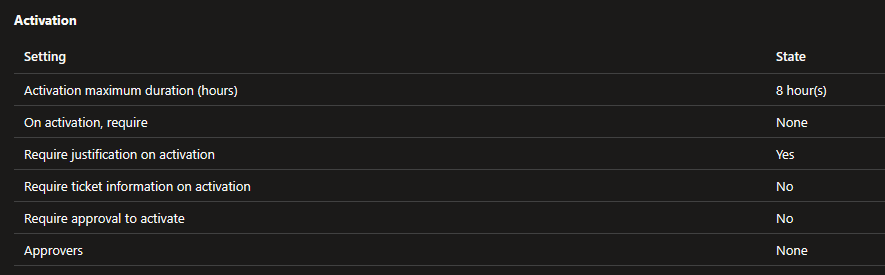
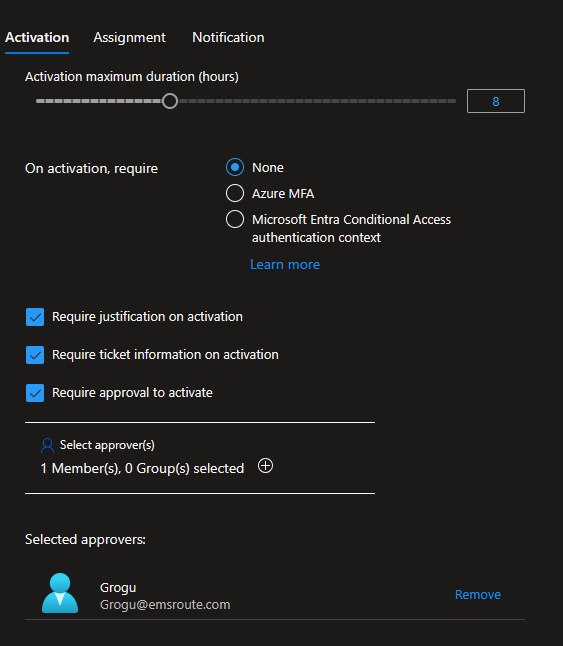
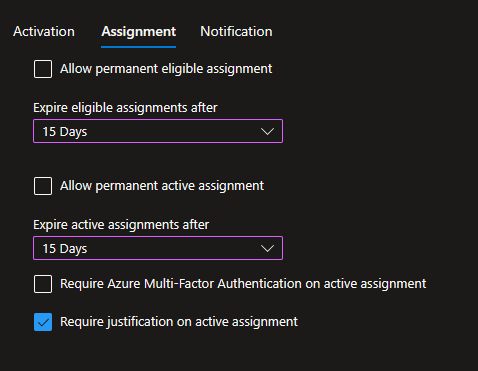
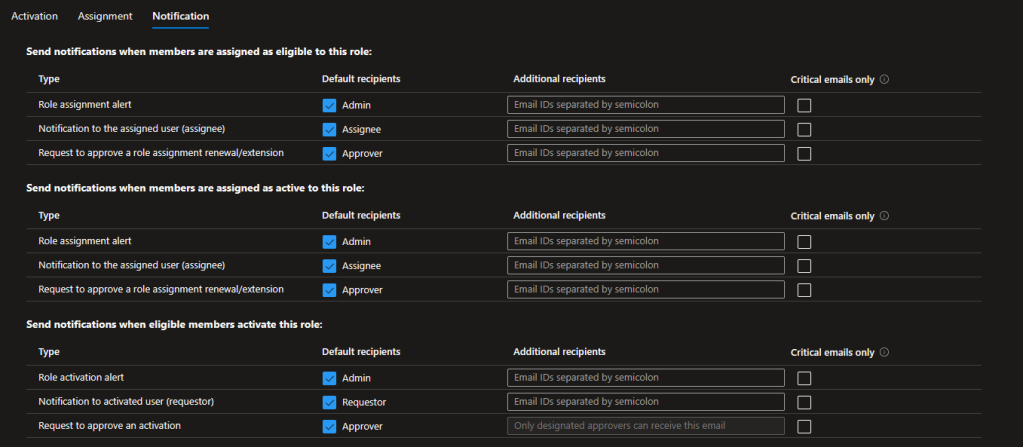
Change the PIM for group settings (optional)
Go to the Settings option and select the role you need to change. I select the Member role for this instance

Change the required fields

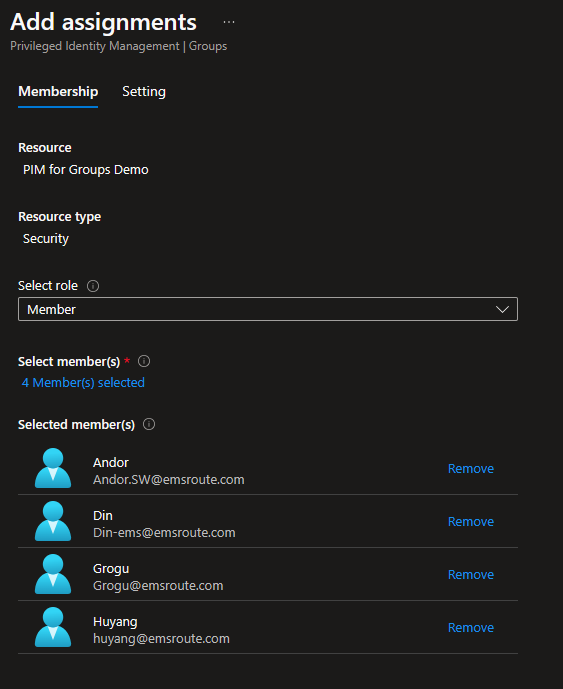
Add assignments as Required
Set the eligibility

Usages Explained
- PIM for groups Intune RBAC
- Azure Resource Access with JIT
- Access to a Team or SharePoint Resource
- Just-In-Time License Assignment Groups
- Temporary exclusions in Conditional Access Policies
PIM for groups Intune RBAC
As you may know, RBAC in Microsoft Intune has all the settings covered and admins can mix and match the required permissions when creating RBAC for the other IT teams. However, what’s lacking at the moment is the ability to set up Just In Time access so the permissions can be elevated if and when needed. This is possible for the highly privileged in-built roles (i.e. – Intune Administrator role) but in the real world, you don’t need to make everyone (or anyone) an Intune Administrator but must need to provide RBAC for certain activities but then again need to control so they have access only for 8 hours (example). This can be achieved via PIM for Groups. Have a look at the article I wrote on the same sometime ago and it has the steps to achieve this.
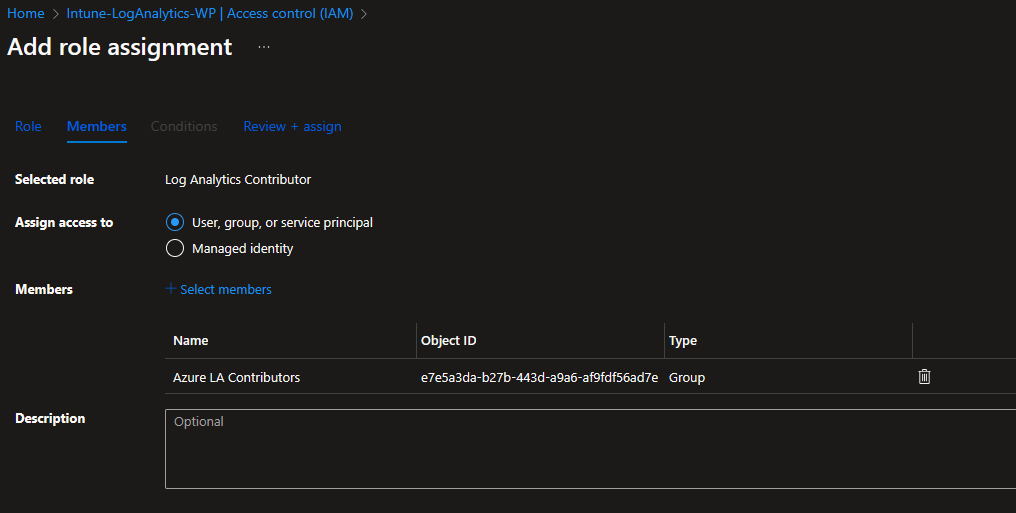
Azure Resource Access with JIT
This is another great example of how you can provide just-in-time access to Azure resources by using PIM for groups. Our use case here again is how to give users RBAC permissions so they will be a members of a group that has access to the resource or to the setting.
- Go to your Azure Resource and set the Acces Control option to set the required group.
💡While this is great for internal IT staff, this is well suited for contractors and anyone who needs to access the resource only for a short period of time.
Access to a Team or SharePoint Resources
This can be a great option if you need just-in-time access for a Team or an SPO resource access governed by a group. Provided you have set the permissions to the group appropriately to the group object, the memberships can be set up according to the method I mentioned above. This can be a great option if an external party needs to collaborate.
Just In-Time License Assignment Groups
For this example, I’m using Power Automate Free. But this can be something different in your case or it can be a license that needs to be approved by the manager of the department so the team member can request it for the specific time as they will be on-charged to the user’s department.
- Make sure you have assigned the required license to the group.

- On Board to PIM for Groups option
- Set the settings to ask for justification when requesting for license and an approver
Set the time periods
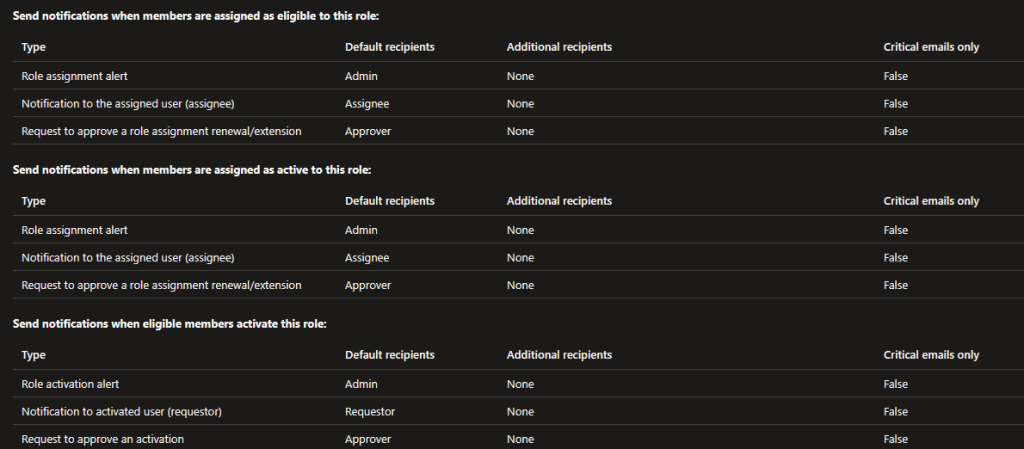
Set the Notifications
Temporary exclusions in Conditional Access Policies
Disclaimer – Make sure you have well documented the Conditional Access Policies and tested them before you make any changes as making changes can affect Security as well as open pathways to unanticipated issues.
I want to give you one use case that I have seen very frequently, of course, you need all your users challenged by MFA in various situations or block access. One situation can be any access attempts that are not originating within the country will be blocked. Familiar?
So you may have set up your exlusions by using user groups or maybe adding individual users on a case-by-case basis into the COnditinal Access Policy.
Adding the users into the policy is not recommended and always use a group for that. And most probably you may have another Conditional Access Policy with a different set of restrictions for those users who need to travel out of the country so they will be governed by the other policy.
How many times have they advised you that they are back in the country and they need the previous set of restrictions to be applied against their identity? Yep, I thought as much.
Use a group that has been onboarded in PIM for the group as the exclusion in the Main CA Policy and as an inclusion in the secondary CA Policy. In this way, they don’t need to advise you. You get that information in the ticket and you set the group membership access with the Just In Time options. Once they are back on the given date, they will be back on the original policy as their access has expired in the group.
Wrapping Up
These are just 5 straightforward use cases, but there can be more, and ideally, whenever you need to govern access using a group, you can think about adding another layer (JIT) to it, thus maintaining a good Privileged Identity Management practice.
Discover more from EMS Route
Subscribe to get the latest posts sent to your email.

One thought on “5 Practical Usages of PIM for Groups Explained”