
Update 18/06/2024
Protected Actions are out of Preview and have 17 actions as opposed to 7 actions that was there when it was in preview.
✅Available Protected Actions
- Update basic properties for Conditional Access policies
- Create Conditional Access policies
- Update allowed cloud endpoints of cross-tenant access policy
- Update Microsoft Entra B2B collaboration settings of the default cross-tenant access policy
- Update Microsoft Entra B2B direct connect settings of the default cross-tenant access policy
- Update cross-cloud Teams meeting settings of the default cross-tenant access policy
- Update tenant restrictions of the default cross-tenant access policy
- Update Microsoft Entra B2B collaboration settings of cross-tenant access policy for partners
- Update Microsoft Entra B2B direct connect settings of cross-tenant access policy for partners
- Create cross-tenant access policy for partners
- Update cross-cloud Teams meeting settings of cross-tenant access policy for partners
- Delete cross-tenant access policy for partners
- Update tenant restrictions of cross-tenant access policy for partners
- Update basic properties of custom rules that define network locations
- Create custom rules that define network locations
- Delete custom rules that define network locations
- Update Conditional Access authentication context of Microsoft 365 role-based access control (RBAC) resource actions
At the time of writing this is still in Preview, but I was curious to find out more about this as anything Security and Azure AD-related is good :)
What are Protected Actions?
Protected Actions feature is an added layer of security in Azure AD for certain actions you perform
What Licenses You Require?
Azure AD Premium P1
What is the Added Security Layer?
Among the controls, it is recommended to use the strongest authentication method to protect the critical configurations.
- Stronger MFA authentication strengths, such as Passwordless MFA or Phishing-resistant MFA,
- Privileged access workstations, by using Conditional Access policy device filters.
- Shorter session timeouts, by using Conditional Access sign-in frequency session controls.
- Or any other strong auth method you create in Authentication Methods > Authentication Strengths
How to Create a New Authentication Strength?
Check my below blog post regarding the same
https://shehanperera.com/2022/10/17/configure-aad-auth-strengths-1/
What are the Actions that are Protected?
These are the current actions covered under the Preview.
- Conditional Access policy management
- Custom rules that define network locations
- Protected action management
What are the Permissions Which are Protected?
| Permission | Description |
|---|---|
| microsoft.directory/conditionalAccessPolicies/basic/update | Update basic properties for conditional access policies |
| microsoft.directory/conditionalAccessPolicies/create | Create conditional access policies |
| microsoft.directory/conditionalAccessPolicies/delete | Delete conditional access policies |
| microsoft.directory/namedLocations/basic/update | Update basic properties of custom rules that define network locations |
| microsoft.directory/namedLocations/create | Create custom rules that define network locations |
| microsoft.directory/namedLocations/delete | Delete custom rules that define network locations |
| microsoft.directory/resourceNamespaces/resourceActions/authenticationContext/update | Update Conditional Access authentication context of Microsoft 365 role-based access control (RBAC) resource actions |
I already Have PIM. Why Do I Need This?
As previously mentioned Protected Actions feature is an added layer of security. You can still have ongoing security on the RBAC. Some combinations you can use.
- Standard PIM with MFA (No Protected Actions)
- Standard PIM with MFA + Protected Actions
- Strong Auth enabled PIM + Protected Actions
How to Configure Protected Actions?
Now that you know the basics of Protected Actions, let’s see how to configure it.
- Creating the Authentication Context
- Creating the Conditional Access Policy
- Creating the Protected Action/s
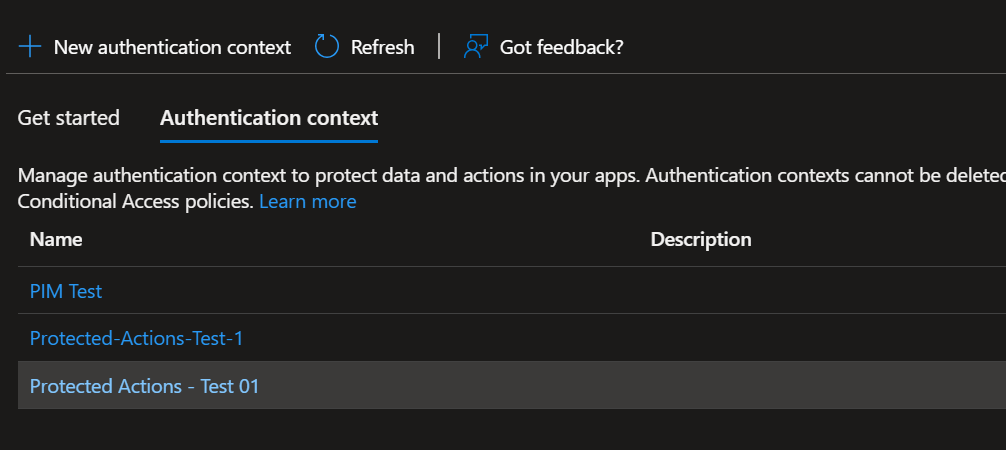
Creating the Authentication Context
Login to Entra Portal on https://entra.microsoft.com > Protect & Secure > Conditional Access > Authentication Context

Select New Authentication Context

Check the Authentication Context to see the created record
Create your Conditional Access Policy
Protect & Secure > Conditional Access > Conditional Access > Policies > New Policy
Select the user/ users or user groups you need to apply the policy to
Select the Authentication Context created

Add Conditions if needed
Select Grant > Require strong authentication > Select the Strong Authentication method
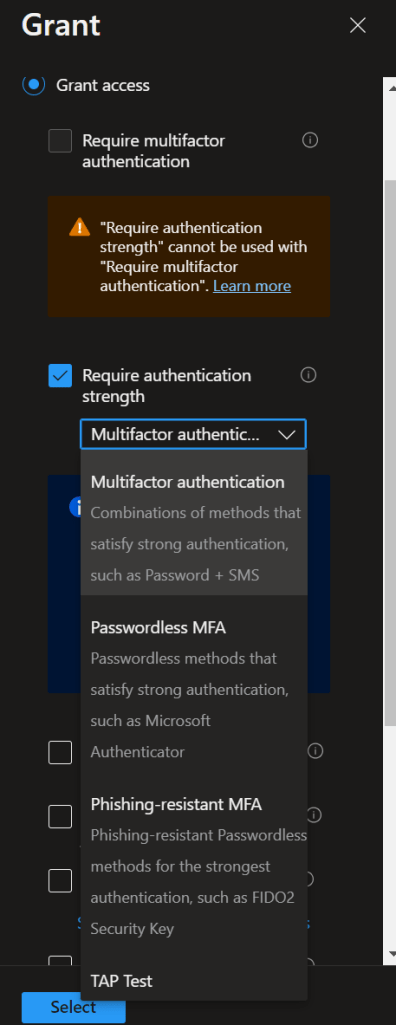
And complete the CA Policy creation
Creating the Protected Action/s
Entra Portal > Roles & Admins > Protected Actions
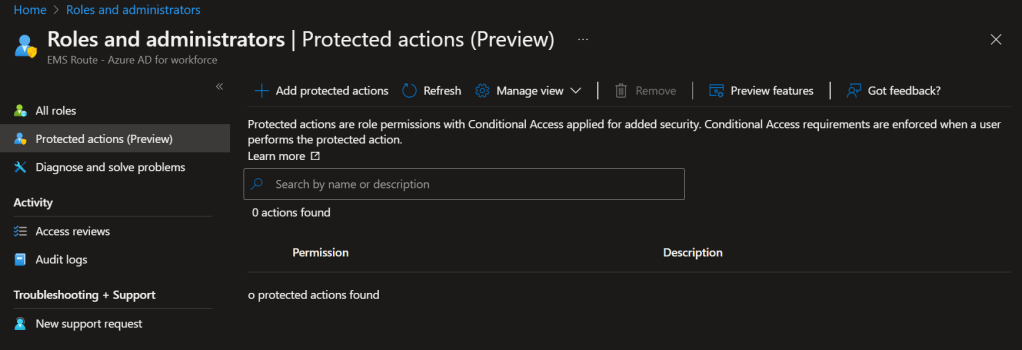
Select Add Protected Actions
Select the Authentication Context we created in the previous step

Select the required permissions and Save

Once done, the actions will be as below

By clicking on the Conditional Access Authentication Context for the selected permission, you can select a different Auth Context that’s connected to a different Conditional Access policy if required.
And the configuration is done.
Let’s Test this now
My user logged in to the Entra Portal as a Global Administrator. He is trying to add a new Named Location and we have added the below permissions as Protected Actions.
microsoft.directory/namedLocations/create
microsoft.directory/namedLocations/delete
And the user will get the below warning.

When press Yes, it will be directed to the below page

At this stage, it says the user can’t continue with the operation as the user doesn’t have any strong auth methods configured

Microsoft Graph
Add protected actions using Microsoft Graph
The following example shows how to get the authentication context ID that was set on the microsoft.directory/conditionalAccessPolicies/delete permission.
Protected Actions Best practices
Here are some best practices for using protected actions which I’ve copied from Microsoft Learn
- Have an emergency account When configuring Conditional Access policies for protected actions, be sure to have an emergency account that is excluded from the policy. This provides a mitigation against accidental lockout.
- Move user and sign-in risk policies to Conditional AccessConditional Access permissions aren’t used when managing Azure AD Identity Protection risk policies. We recommend moving user and sign-in risk policies to Conditional Access.
- Use named network locationsNamed network location permissions aren’t used when managing multi-factor authentication trusted IPs. We recommend using named network locations.
- Don’t use protected actions to block access based on identity or group membershipProtected actions are used to apply an access requirement to perform a protected action. They aren’t intended to block use of a permission just based on user identity or group membership. Who has access to specific permissions is an authorization decision and should be controlled by role assignment.
Wrapping Up
There are far corners of Azure AD that are very sensitive and only highly skilled engineers should perform as it can affect the whole infrastructure and the end users. This will make sure these actions are protected and you need more than PIM to be eligible to perform them.
Since this is still the Preview, I believe there will be more permissions coming up once this is in GA, and excited to test once they are available.
Discover more from EMS Route
Subscribe to get the latest posts sent to your email.
