
- Few uses of PIM-managed groups
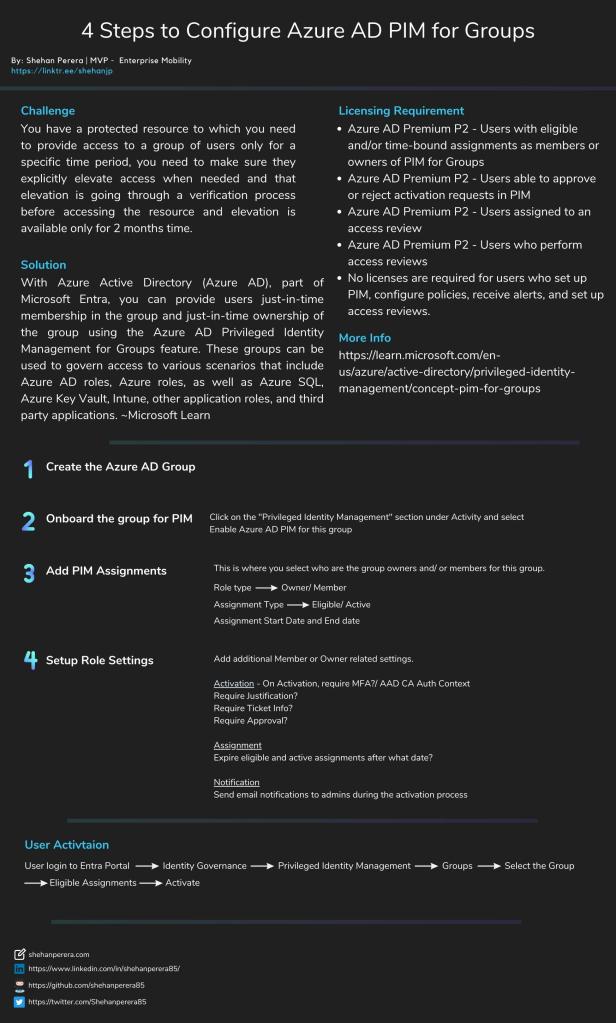
- Challenge
- Solution
- Few Notes
- Prerequisites – Licenses
- Step 1 – Group Creation
- Step 2 – Onboard the group for PIM
- Step 3 – Add PIM Assignments
- Step 4 – Setup Role Settings
- User Activation
- Use Access Reviews
- Wrapping Up
When I 1st posted the below infographic in my Socials, I thought I made myself clear that this is not an Azure AD PIM-enabled group where you can set up RBAC to a bunch of users so anyone in that group will get the eligible or active role.
This is a relatively new feature (Preview at the time of writing) where you can PIM your group memberships for Just In Time access scenarios. Let’s dig in!
Few uses of PIM-managed groups
- Group Licenses management scenarios
- Accessing SharePoint resources for a limited period of time
- Teams memberships
- Accessing Azure resources
- Access to Intune apps
- Intune policy mapping for user assignments
Challenge
You have a protected resource to which you need to provide access to a group of users only for a specific time period, you need to make sure they explicitly elevate access when needed and that elevation is going through a verification process before accessing the resource and elevation is available only for 2 months time.
Provide Just In Time access to the Ownership or membership to the group
Solution
Privileged Identity Management for Azure AD Groups. This will add an Identity Governance layer in front of the protected resource. At the time of writing this is in the Public Preview mode.
With Azure Active Directory (Azure AD), part of Microsoft Entra, you can provide users just-in-time membership in the group and just-in-time ownership of the group using the Azure AD Privileged Identity Management for Groups feature. These groups can be used to govern access to various scenarios that include Azure AD roles, Azure roles, as well as Azure SQL, Azure Key Vault, Intune, other application roles, and third party applications. ~Microsoft Learn
Few Notes
- Groups can be role-assignable or non-role-assignable. The group can be enabled in PIM for Groups or not enabled in PIM for Groups. These are independent properties of the group. Any Azure AD security group and any Microsoft 365 group (except dynamic groups and groups synchronized from on-premises environment) can be enabled in PIM for Groups. The group does not have to be role-assignable group to be enabled in PIM for Groups. ~Microsoft Learn
- In Azure AD, role-assignable groups can’t have other groups nested inside them. ~Microsoft Learn
Prerequisites – Licenses
- Azure AD Premium P2 – Users with eligible and/or time-bound assignments as members or owners of PIM for Groups
- Azure AD Premium P2 – Users able to approve or reject activation requests in PIM
- Azure AD Premium P2 – Users assigned to an access review
- Azure AD Premium P2 – Users who perform access reviews
- No licenses are required for users who set up PIM, configure policies, receive alerts, and set up access reviews.
Step 1 – Group Creation
You can create Azure AD Security Groups of M365 Groups. These should be assigned groups as Dynamic groups will not work.
Step 2 – Onboard the group for PIM
Go to the created group. Navigate to the Activity section

Click on Privileged Identity Management (Preview)
Press Enable Azure AD PIM for this group button
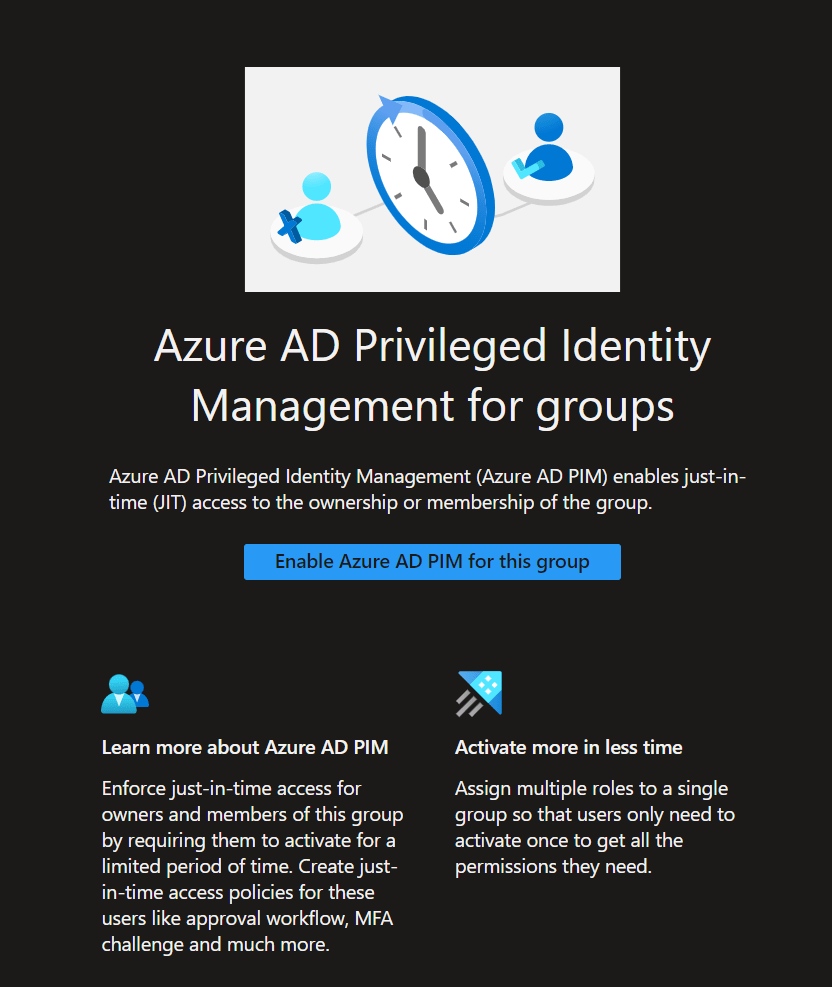
This will onboard the group into PIM

This is now ready for the Assignments

Step 3 – Add PIM Assignments
In the same way, you performing Assignments for RBAC, you can do the same here as well. Add your Owners and Members
Select the Eligible Assignments > Select the Role (Member or Owner)
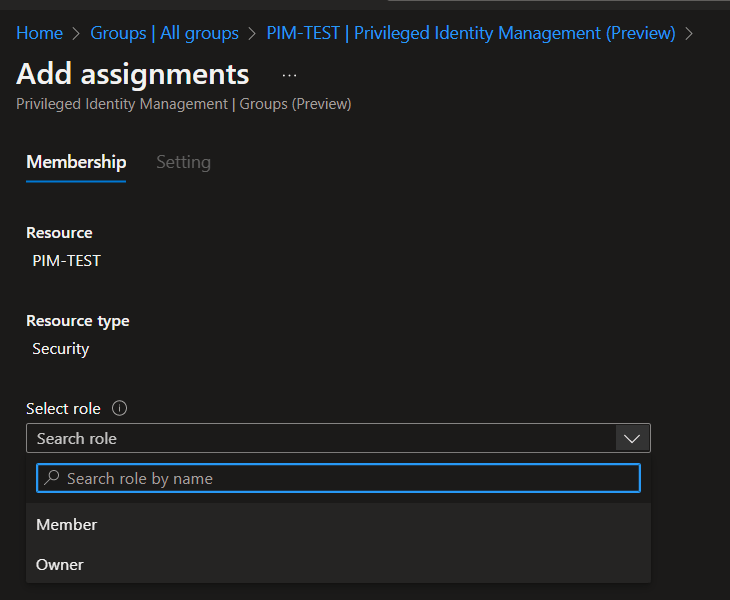
Select the users
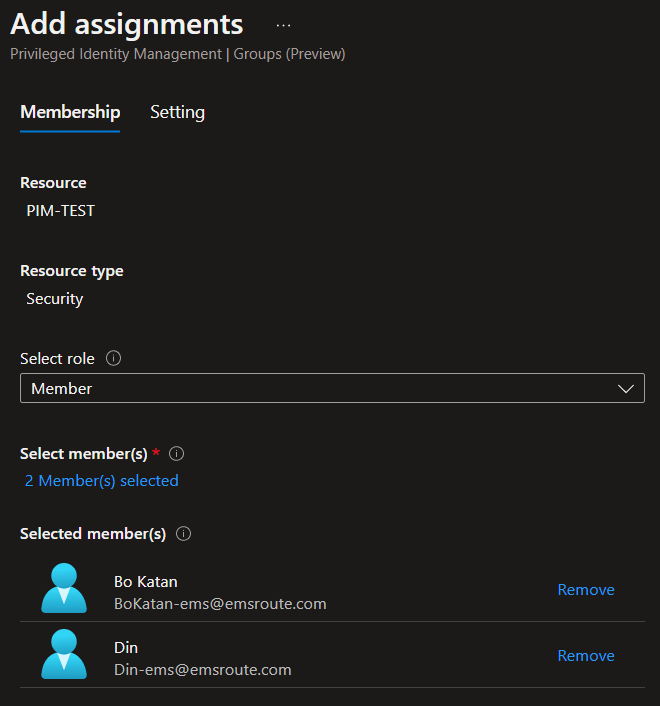
Select the Assignment type (Eligible or Acive)
If Eligible – User has to elevate membership access
If Acrive – User will get access without elevating
Set the Assignment Start – End dates/ times
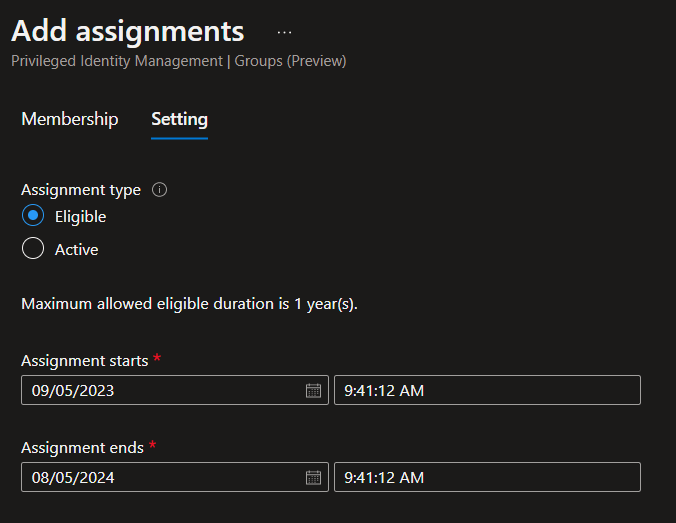
And press the Assign button.
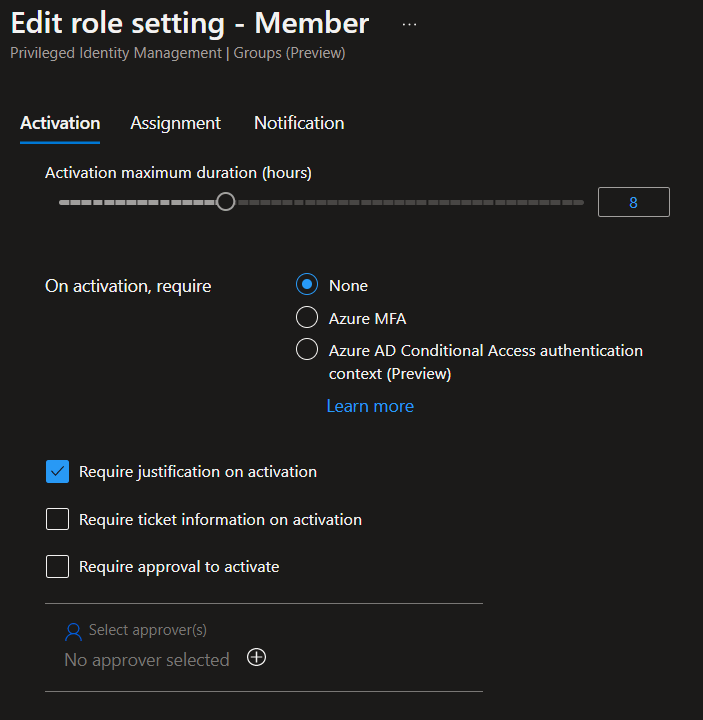
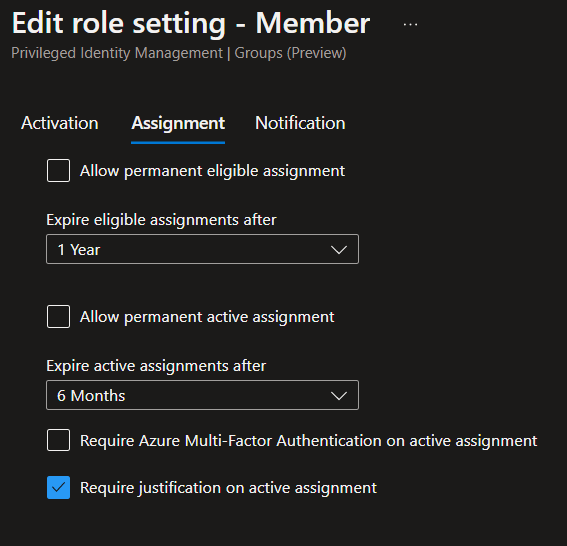
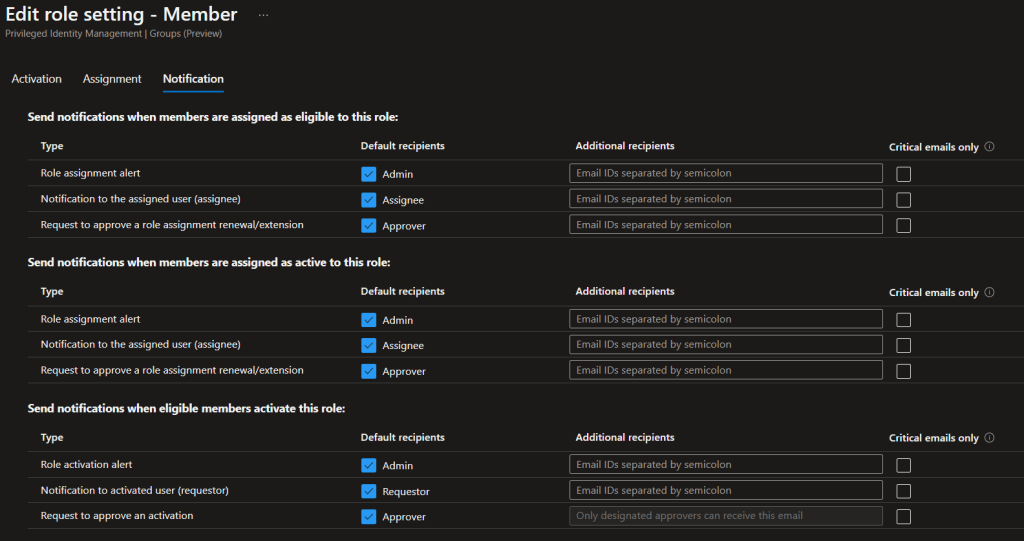
Step 4 – Setup Role Settings
This is where you add more protection over “On Activation” of the membership. Same as in RBAC roles.
In the same panel, select Settings

Select the user type you want to configure the settings (Member or Owner)

Click Edit
Set Activation, Assignment, and Notification settings
Setting up Azure MFA or AAD CA Auth Context can be good security setting so bad actors will not be able to gain access
And once you set these options, you are done with the configuration part and can advise the users regarding the memberships.
User Activation
User will have to go to aka.ms/pimg or
Entra portal at https://entra.microsoft.com > Identity Governance > Privileged Identity Management > My Roles > Groups
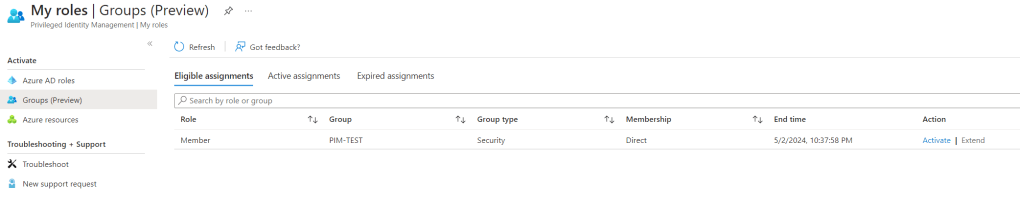
Click on Activate.
User will have to justify the reason

And press Activate
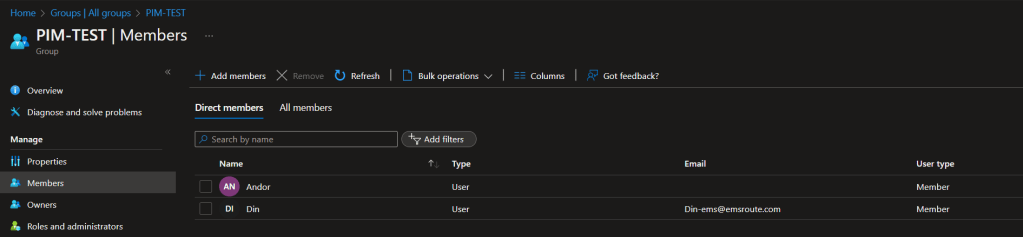
Once Activated, my user Din-Ems@emsroute.com will be added as a member of the PIM managed group

Group membership as below
Use Access Reviews
Additionally to the PIM related tasks, Access Reviews can be performed to make sure the correct users are in those groups. This can come in handy for long-term membership assignments.
Wrapping Up
I believe when this is in GA, many organizations will start using this to strengthen their user management strategies. In this way you can promote Just In Time memberships as you set up Just In Time RBAC role access, explicitly approving access to resources when they want to become a member of the group and etc. At the end of the day, it’s all about governing your Identity fleet in a better way and being on top of it and this is a good step in that direction.
Discover more from EMS Route
Subscribe to get the latest posts sent to your email.

2 thoughts on “4 Steps to Configure Azure AD PIM for Groups”