
This is a 2 part series and I would like to get to the nitty gritty of BYOD because as IT Pros or leaders who are managing IT in an organization, we have dealt with BYOD (Bring Your Own Device) related questions at least once in our career. Not once, but maybe daily or maybe at least once every month. Some have a very easy policy where BYODs are allowed whereas some organizations have strict policies where they don’t allow BYODs at any point or if you are to access company data on your personal device the device must comply accordingly. It all depends on how you need to allow your data to be accessed from other devices. Where BYOD can be a blessing for some organizations, it can be a nightmare for others. My idea is to do a bit of a deep dive with some technical info that supports all of the above states.
You will notice the scenarios wil have a lot of restriction methods. As the blog topic says, Its a love-hate relationship. Either you restrict or allow with caution. I will beexploring the Azure AD Registering scnarios in my next BYOD article.
BYOD Platforms in this article: Windows, iOS, Android

What I will be covering? 👇🏽
- Scenario 1 – Restrict Accessing Company Data Completely from Unenrolled Devices in Intune
- Scenario 2 – Restrict Accessing Company Data Outside of the Corp. Network from Unenrolled Devices in Intune
- Scenario 3 – Get the user to accept the “Terms of Use” Before Accessing Data
- Scenario 4 – Stop Users from Registering Personally Owned Devices
- Wrapping Up
My goal is to cover all possible main scenarios when it comes to BYOD access and provide technical info as much as I can as the control settings can be in many places.
Scenario 1 – Restrict Accessing Company Data Completely from Unenrolled Devices in Intune
Use Conditional Access Policies to block access
If your company policy is to restrict accessing company data from unenrolled devices, you can simply set up a Conditional Access Policy to create the block. Make sure you add the user groups, but not all users at once. The reason is you don’t want to lock yourself accidentally.
In the CA Policy, the main thing you need to capture is the devices that are not Azure AD joined or Hybrid AAD Joined.
This will be under the Conditions section in your policy.
Result
When the user tries to login to M365, they will get the below message.

Scenario 2 – Restrict Accessing Company Data Outside of the Corp. Network from Unenrolled Devices in Intune
Your IT policy may have the flexibility for the BYOD users to login to M365 services ONLY in the corporate environment. For that, you can add a new CA Policy to allow access to the unenrolled devices by adding a Location Condition.
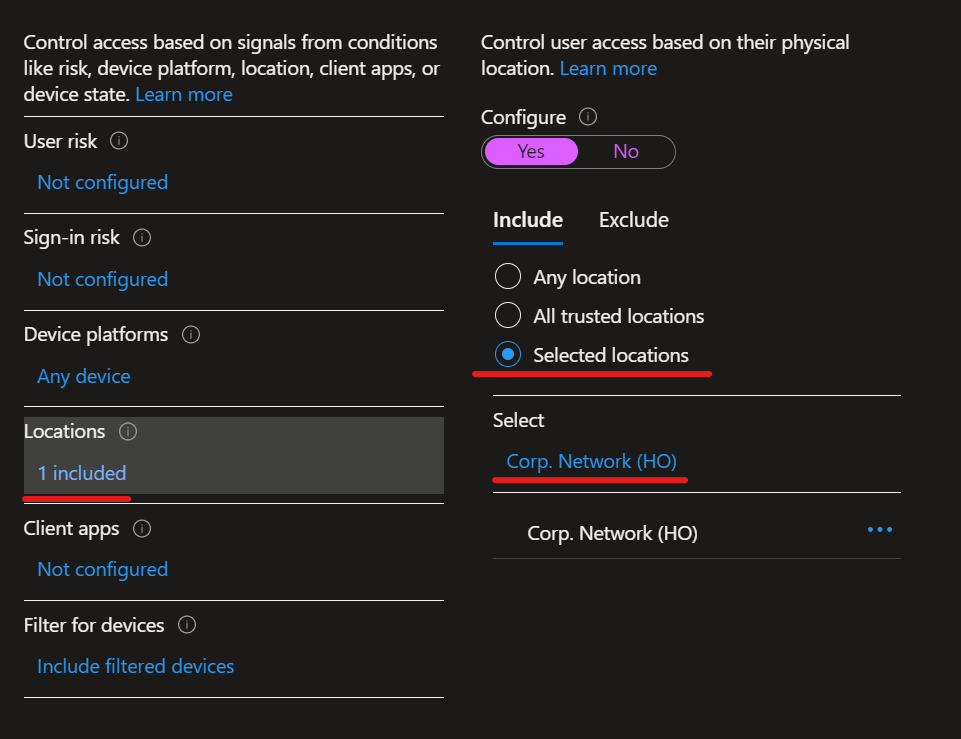
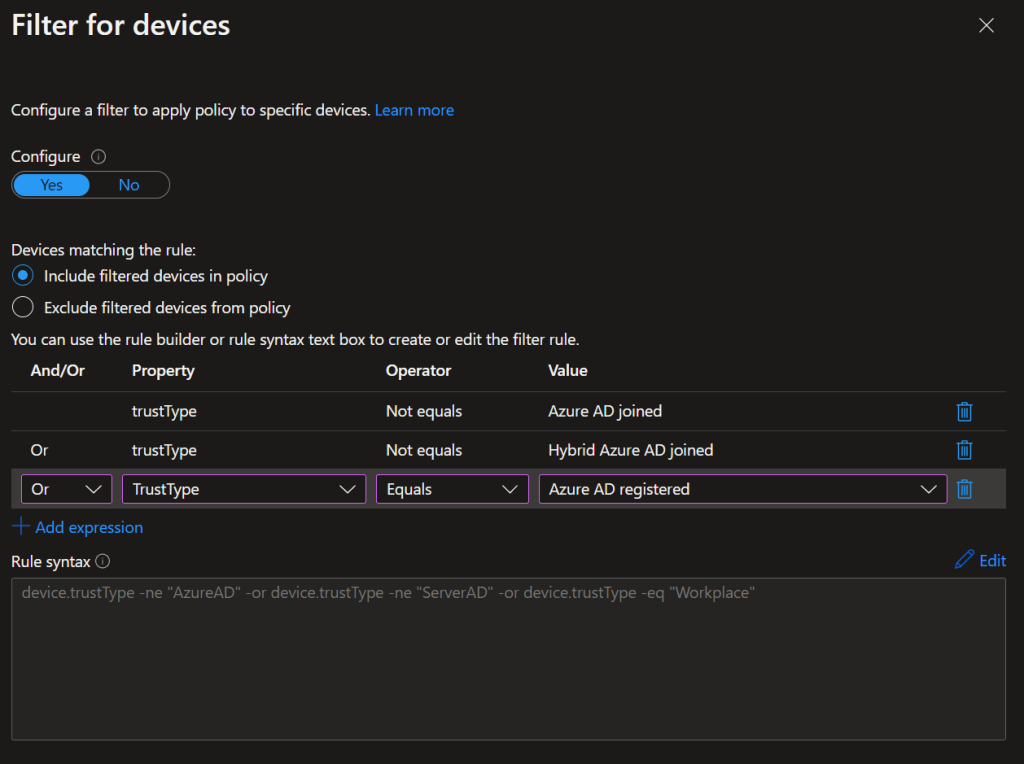
Add the Device Filter Condition as below.
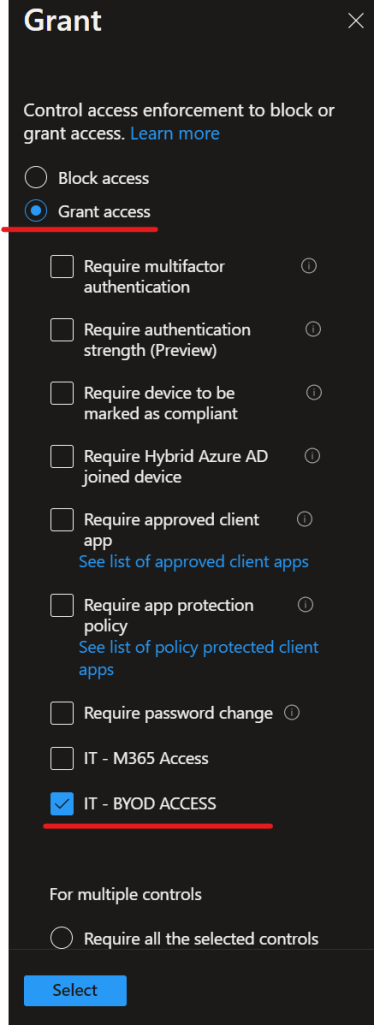
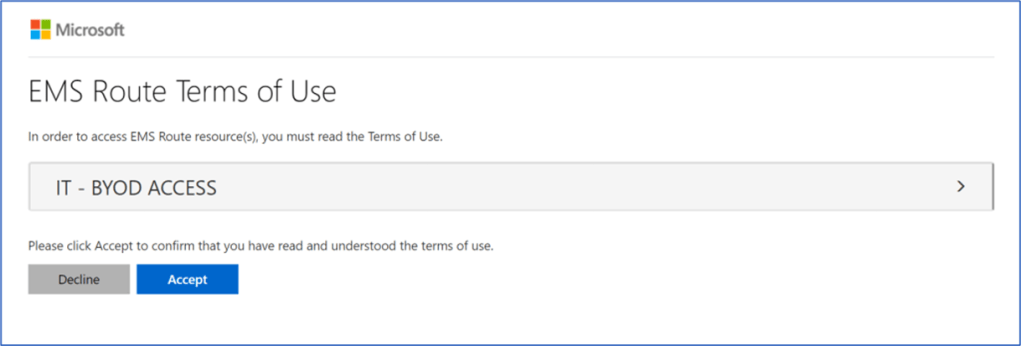
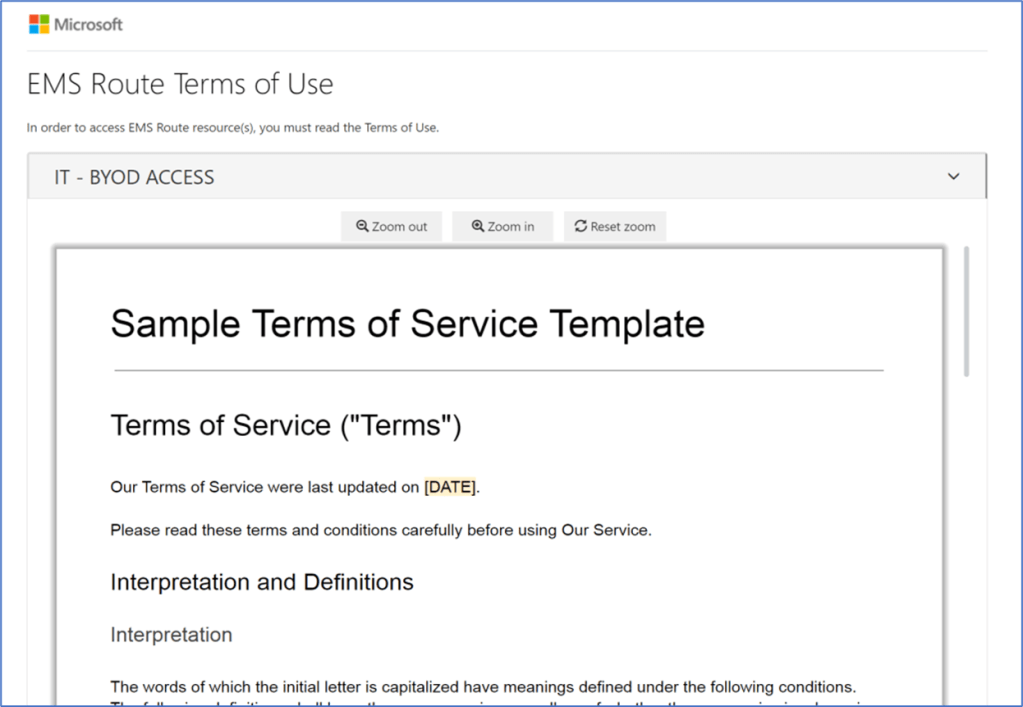
Scenario 3 – Get the user to accept the “Terms of Use” Before Accessing Data
Most organizations will have their own IT policies and in most situations, users will have to consent to them at the onboarding stage so they know what they can and can’t do. Like in the same way, you can create Terms of Use in Azure AD and bind it with a CA Policy for those devices that are NOT AADJ or NOT HAADJ or Workplace Joined.
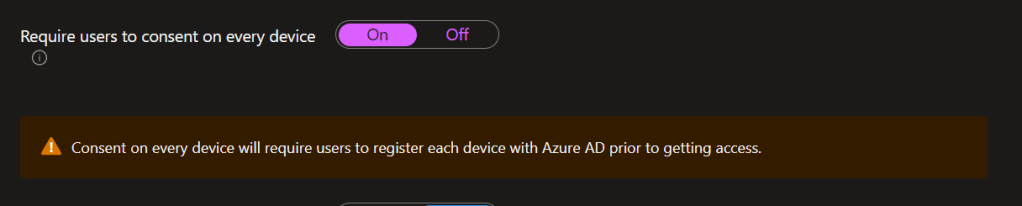
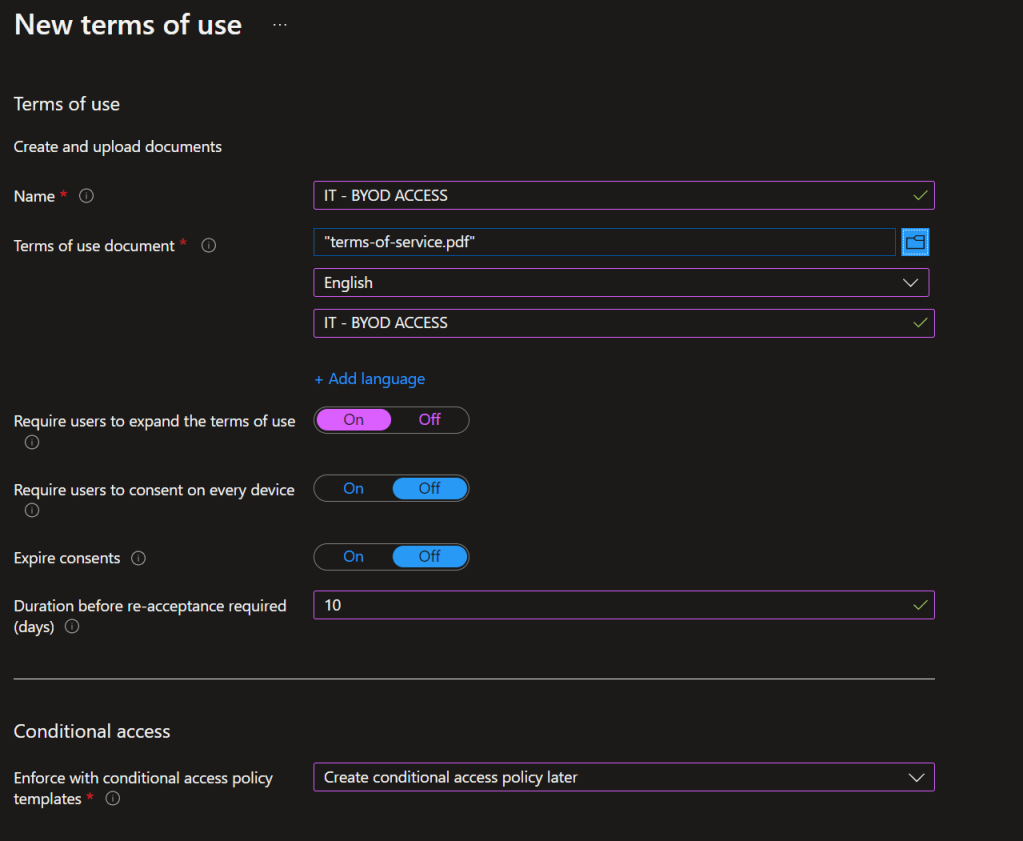
Note – The below has shown on how to create the policy so that the BYOD user can ACCEPT the terms before login into M365. Once Accepted, it will only prompt after the given number of days. If you need the user to consent on every device, then the device must be registered in Azure AD. In this way, you can create your IT Policy around the scenario so everyone is covered.
Create the Terms of Use
Go To Entra Portal > Protect and Secure > Conditional Access > Terms of Use
Create the CA Policy As usual with the device filters in the sam way I created in the previous scenarios.
In the Grant option and select the previously created Terms of Use. Of course, MFA is vital and the assumption is you already have MFA configured.
Result
Scenario 4 – Stop Users from Registering Personally Owned Devices
This means, Strictly NO BYOD. The restrictions can be set for all platforms.
If you have a NO BYOD policy, maybe you can combine Scenario 1 and 4. In that way, you can restrict any personally owned device and can restrict registering into Azure AD as well.
To set the restrictions, go to Intune Portal > Devices > Enroll Devices > Enrollment Device platform restrictions > Select the platform > Create the restriction
Below I have selected the Windows platform. In there I have kept the MDM enrollment to ON so users can enroll company devices, but blocking the Personally Owned Devices.
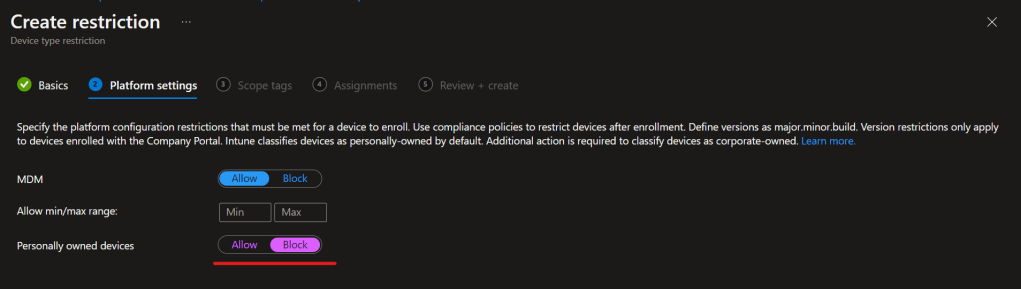
In the same way, you can apply it to other platforms as well.
Wrapping Up
Well, as you can see there is no one size fits for all type policy. It definitely depends on how you need your users to access the company data from personally owned devices in a Zero-Trust environment. At the end of the day, the idea should be Bring Your Own Device in a secure environment and not Bring Your Own Disaster.
In the next article about BYOD, I would like to go further and discuss how to stay on top of your BYOD fleet with Workplace Join mode.
Read the part 2 below.
https://shehanperera.com/2023/02/03/byod-02
Discover more from EMS Route
Subscribe to get the latest posts sent to your email.

One thought on “BYOD – Part 1 – The Love-Hate Relationship”