
What if there is something 100% secure than passwords but doesn’t have too much weight on the configuration and still a phishing resistant authentication method? Passkeys are your answer. Passkeys are not new as you have seen it’s been used pretty much everywhere these days.
- Why Passkeys is the Future of Passwordless Authentication?
- How Passkeys Satisfy MFA?
- Passkey Key Pair – WebAuthn Protocol in Action
- When the Passkey is in a Different Device
- Types of Passkeys
- Configuration Time!
- FIDO2 Coverage for Entra Kerberos
- What’s coming soon? Mid-March 2026
Microsoft Entra is fully supporting Passkeys. Device Bound passkeys which is GA and Synced Passkeys which are still in Public Preview at the moment. this article is basically going through every aspect of passkeys when it comes to Entra.
Why Passkeys is the Future of Passwordless Authentication?
Simply put, passkeys are phishing-resistant. Attackers can no longer trick users into authenticating on fake websites because passkeys are bound to the legitimate service provider’s domain.
Additionally, passkeys cannot be reused or stolen. Authentication requires the private key stored securely on the user’s device, making it impossible for attackers to replay or misuse credentials.
How Passkeys Satisfy MFA?
Passkeys typically satisfy the Multi Factor Authentication even it sounds like a single authentication method.
- Something you have – the device storing the private key (your phone, laptop, etc.)
- Something you know or are – the PIN/password or biometric (fingerprint, Face ID) that unlocks it
Passkey Key Pair – WebAuthn Protocol in Action
Understanding passkey security is important. When the user registers the passkey for their account, a key pair will be created. The Private key will be securely stored in the device if the passkey is device bound and the public key will be located in the user account in Entra ID. But in a Synced Passkey situation, the private key will be encrypted and will be saved in the service that supports synced passkeys. This is the basic of the WebAuthn (Web Authentication) open standard.
- User tries to login to a M365 resource using the passkey
- Entra sends a challenge – a fresh random nonce (a value used only once), along with the Relying Party ID (
login.microsoftonline.com) - The browser/client passes it to the authenticator this is the device’s TPM/ Secure Enclave, FIDO2 key or the Authenticator App via the WebAuthn API.
- User verification happens locally – The user provides biometric or PIN, which unlocks the private key on the device or scans the QR code from the phone which then verifies that with the Authenticator app.
- Upon successful step 4 verification, the device signs the challenge, specifically it signs the authenticator data + a hash of the client data (which includes the nonce, the origin, and the Relying Party ID) The signed response is sent back to Entra. This includes:
- The credential ID – so Entra knows which public key to look up
- The authenticator data – flags confirming user presence and verification
- The signature – produced by the private key
- Entra looks up the public key – using the credential ID, it finds the matching public key on the user’s account Entra verifies the signature, it checks the signature against the public key. If it matches, the challenge was signed by the correct private key Token issued, Entra is satisfied the user is who they claim to be and issues an access token.
When the Passkey is in a Different Device
During the registration process, user can create the passkey in the same device or in a different device using an app such as Microsoft Authenticator or use a FIDO2 key. If it’s the same device, typically it’s the TPM of a Windows device or the Secure Enclave of Mac device. However, if this is done in a different device, there are 2 types of passkey modes.
Plug-in passkeys
USB connectivity or NFC will complete the process. User will have to touch the device when it signals which completed the verification process. This is mostly the biometrics challenge which then sends the details to sign the challenge.
Passkeys in Authenticator Apps
Password Managers or Microsoft Authenticator, Key Chain: Create a secure encrypted tunnel between your device and the laptop via Bluetooth to complete the challenge flow and to transport the WebAuthn.
Types of Passkeys
Device Bound Passkeys
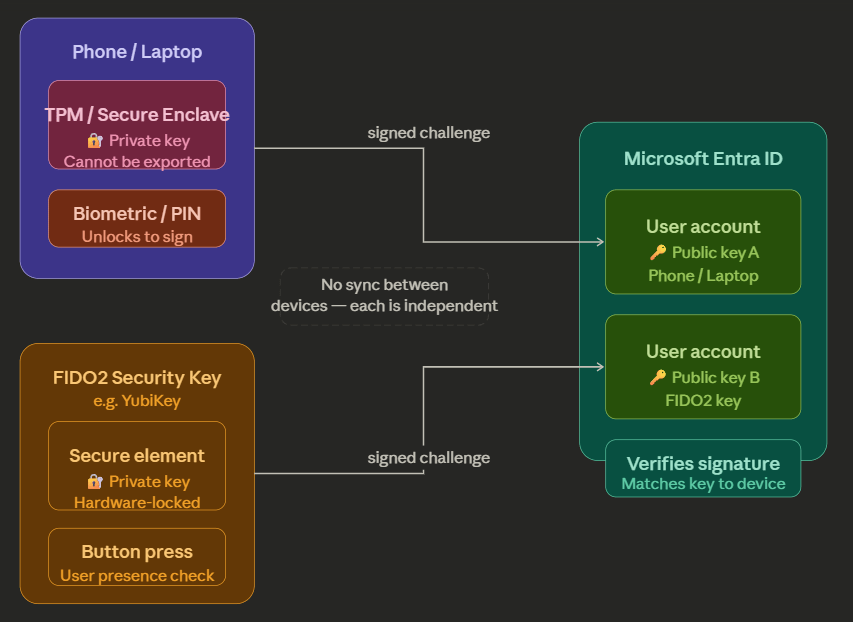
As the below diagram explains, you can create device bound passkeys for the same user account from different devices. However, in this case it will create separate key pairs and are working separately without a sync. As you can see, in a situation where you have a single passkey for the account and if the device is lost, you will have to create a new passkey for the new device.
Device Bound Passkey Usage
Specifically, a FIDO2 key. A classic scenario where you are using MFA along with the Authenticator App with your standard account. You are with the Cloud Team in your organization, and you have an RBAC enabled account that is eligible to elevate access to Application Administrator role. Authentication Strength is set to a FIDO2 key where you have to complete the MFA process when elevating access.
This reduces the attack surface by only allowing the specific FIDO2 key to the high-privileged role Application Administrator and also not allowing the standard Authenticator app to complete the MFA challenge.
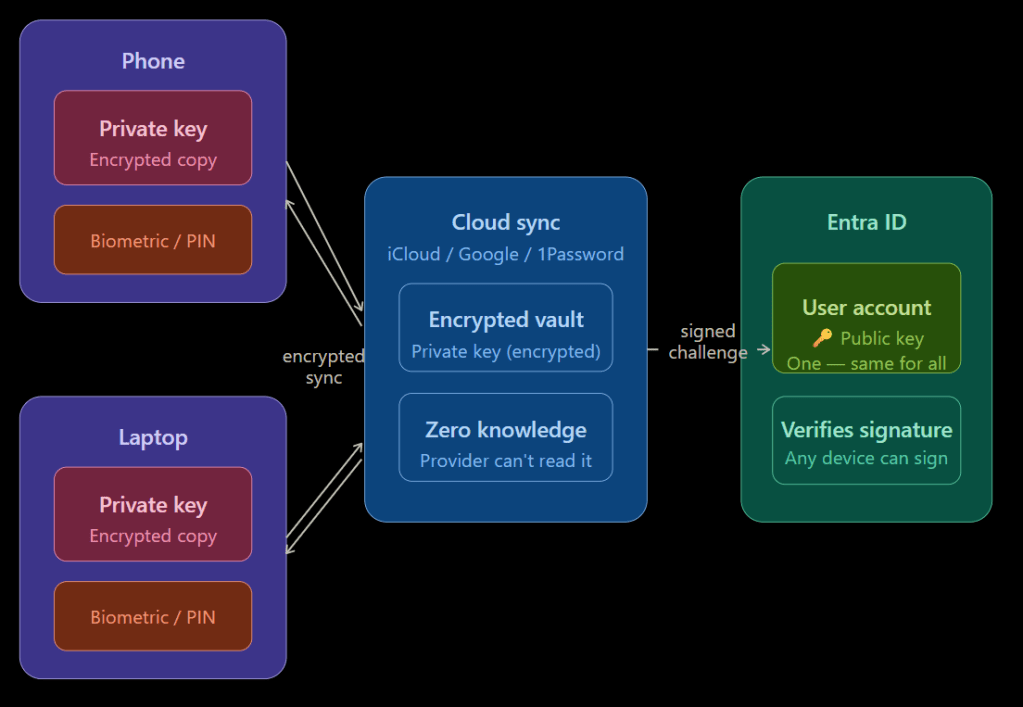
Synced Passkeys
Passkeys saved in the passkey provider’s cloud.
- Apple – Apple Key Chain
- Android – Password Manager
- 1Password – 1Password vault
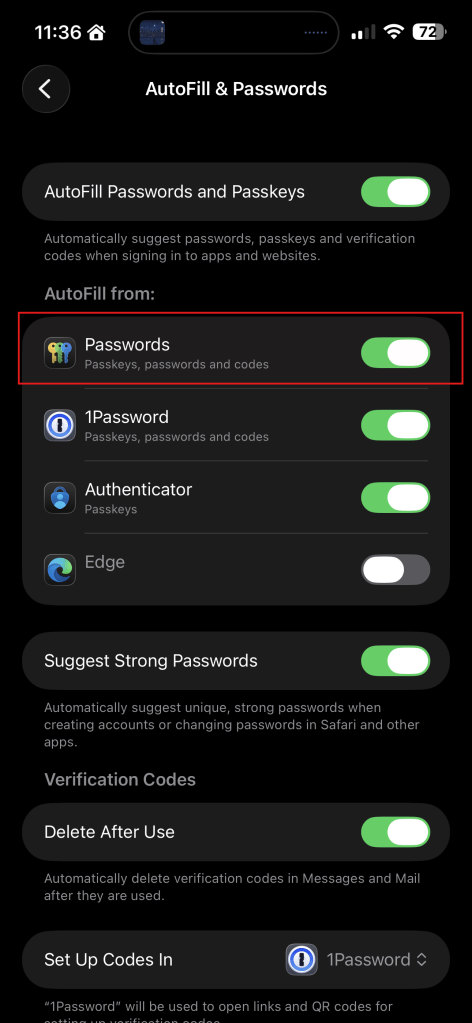
IMPORTANT! – In Apple devices, if you can’t see the Apple Passwords option when you trying to create the Passkey, make sure the below setting is enabled.
Settings > General > AutoFill & Passwords
Configuration Time!
Useful Tip: Test this for a PILOT set of users if Passkeys are new in your organization.
Steps involved:

Configuring Passkeys in Entra
Entra now have the Passkey profiles where you can setup Device Bound or Synced Passkeys to All users or user groups.
Before this change, it was just Device Bound Passkeys and that was it.
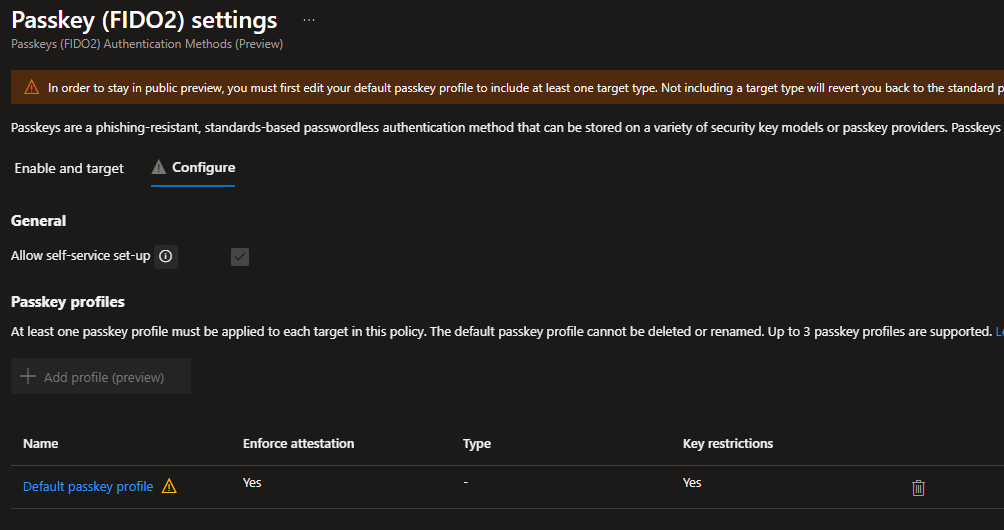
The default profile will look like this.
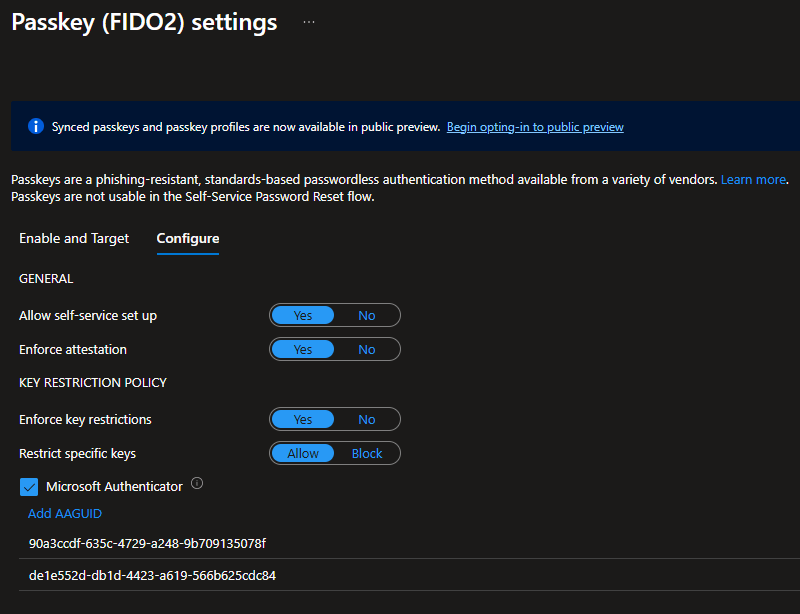
In the above config, it has set to enforce attestation, so you know the FIDO2 key model or the passkey provider is genuine and has the proper certificate from the vendor.
I have also restricted it to Microsoft Authenticator on Android and iOS devices. This is where you can add more FIDO2 key model AAGUIDs.

Synced Passkeys are in Public Preview at the time of writing, but you can create the profiles and start testing them today!
Once you opted in to the Public Preview, you will see the below screen. This is where we start building the profiles and add user groups.
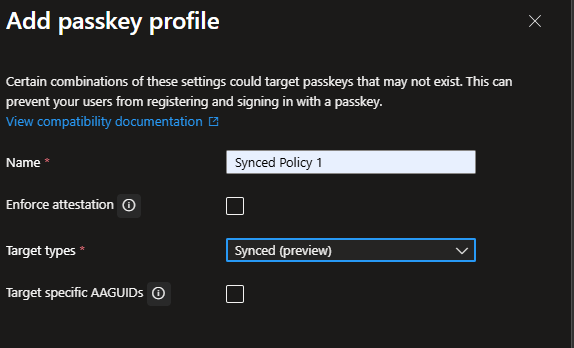
Creating a Synced Passkeys policy
Go to the Configure section and select Add profile
Enforse attestation and Target specific AAGUIDs are not required as this is synced passkeys.
Pres Save.
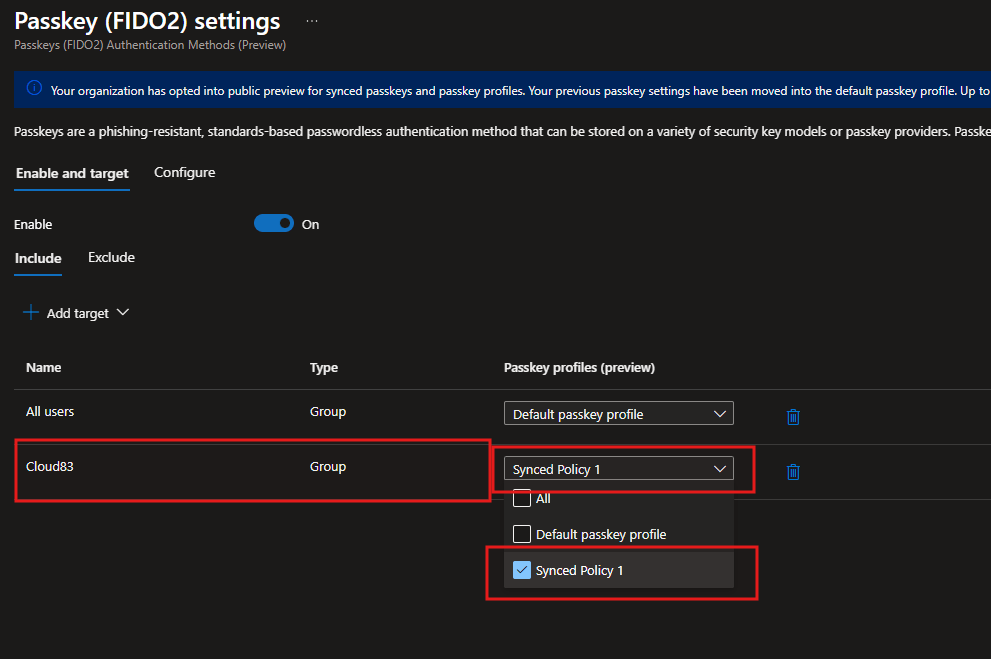
Go to Enable and target tab, and select Add target and select All users or Select targets
You can delete the default All users row and start adding what’s required.
Once done, hit Save
Getting the End Users to Register for a Passkey
This bit is important if you are planning on rolling out the passkeys for the end users. This needs to happen before you enable the CA Policy for the user with the required authentication strength. In that way, when the user signs in, they will be prompted to complete the Passkey process before login into the M365 resource.
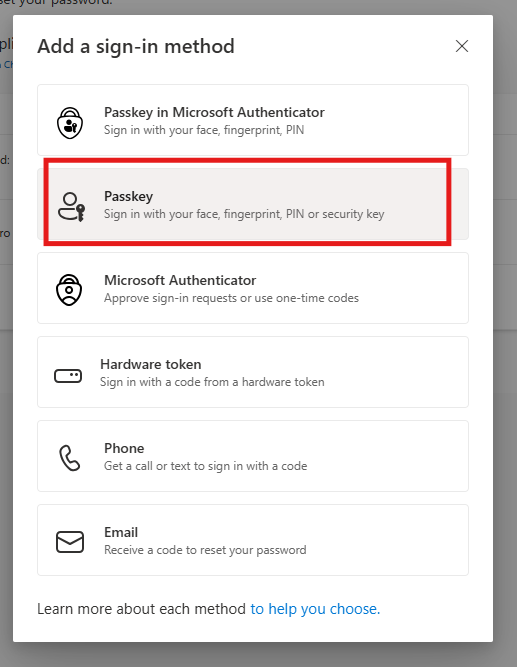
In this way, now the users in the group will have the option of creating a Passkey from the My Account > Security Info > Add sign-in method
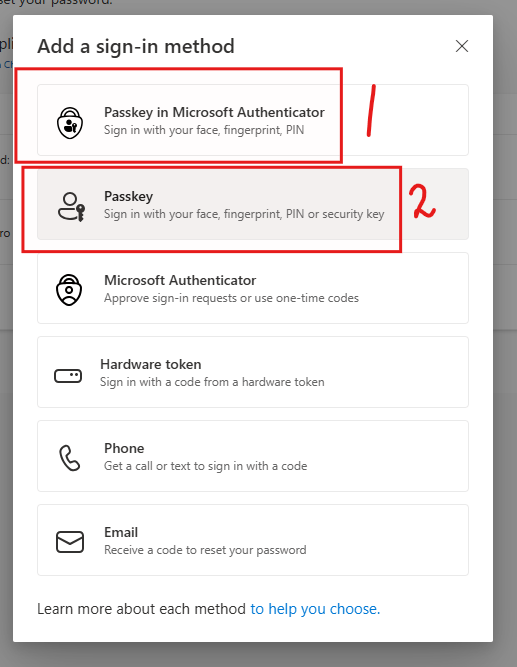
When the Passkey Profile for the user is Device Bound
1 – If you need to create the Passkey in Authenticator so you are not reliant on the device
2 – Passkey in the device. In this case in TPM in Windows, or have the option of creating the Passkey outside of the device.
When the Passkey Profile for the user is Synced
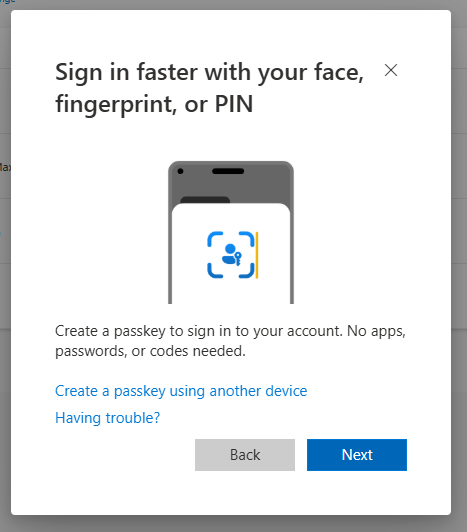
2 – Select Passkey option and select Create Passkey using another device and this will show the Choose where to save your passkey screen. Select iPhone, iPad or Android device
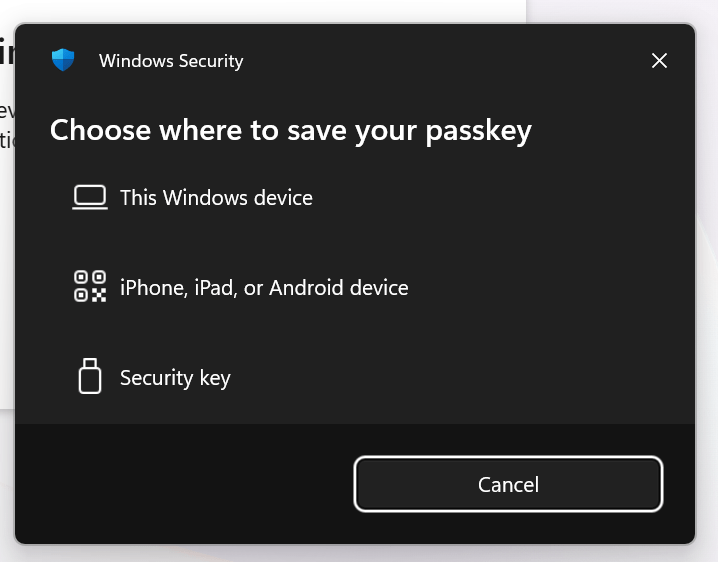
Scan the QR code from your mobile device and select Passwords (Apple Key Chain)
Complete the Scan process and the key will be created in Key Chain.
Make sure you have Bluetooth connectivity between the device you logged in (eg. Laptop) and the mobile device.
Passkey saved in Key Chain will shown in Security info as below.

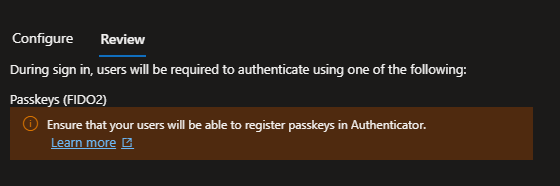
Creating an Authentication Strength in Entra
Creating the Authentication Strength so you can add this in the Conditional Access policy to enforce user to register and use from next time onwards.
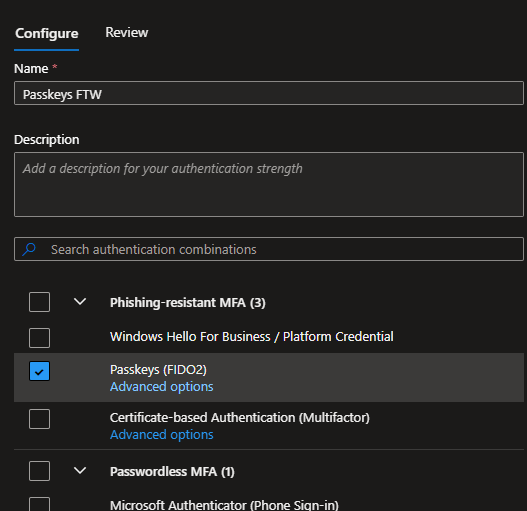
I have taken a leap below and have only selected Passkeys for the strength. However as I mentioned above, male sure you add the CA Policy only to a set of users as a PILOT first.
Conditional Access Policies > Authentication Strength
Strength name: Passkeys FTW
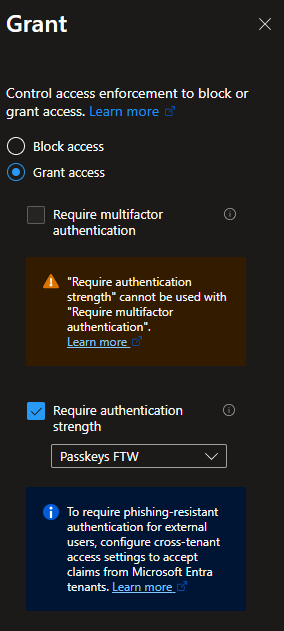
Designing Your CA Policy
Set your users, resources and any other conditions required in the policy.
As you can see below, I have only captured the important bit, I have selected the option Require authentication strength and have given the strength I’ve created earlier.
FIDO2 Coverage for Entra Kerberos
I’ve written an article not too long ago on Cloud Kerberos Trust. Part 1 of that is to configure Entra Kerberos
The good thing about Entra Kerberos is that it’s FIDO2 aware! Meaning when you need to authenticate into on-prem resources from an Entra Joined device, that authentication process can be completed using the Keypass.
What’s coming soon? Mid-March 2026
Microsoft Entra passkeys on Windows
What’s the difference? This is specially for unmanaged devices, personal devices or shared type devices.
What will be in use? This will use Windows Hello (not Windows Hello for Business) to store the Passkeys when accessing Entra-Protected resources.
In other words, the passkey will be saved in the Windows Hello container.
How to opt in? Now that you have enabled the Passkey profiles, you need to create the below profile. Again, test this only for a set of users first.
- Enable the Passkeys (FIDO2) authentication method in Authentication Methods policies.
- Create a passkey profile and configure:
- Attestation enforcement: Disabled
- Key restrictions: Enabled
- Allowed AAGUIDs (required during preview):
- Windows Hello Hardware Authenticator:
08987058-cadc-4b81-b6e1-30de50dcbe96 - Windows Hello VBS Hardware Authenticator:
9ddd1817-af5a-4672-a2b9-3e3dd95000a9 - Windows Hello Software Authenticator:
6028b017-b1d4-4c02-b4b3-afcdafc96bb2 - Note: During Public Preview, you must explicitly add these Windows Hello AAGUIDs to the allowed list.
- Windows Hello Hardware Authenticator:
- Assign the passkey profile to appropriate groups.
- Validate Conditional Access and authentication strengths policies to ensure they support passkey authentication.
- Communicate with pilot users about supported scenarios and enrollment steps.
Discover more from EMS Route
Subscribe to get the latest posts sent to your email.
